Quickstart tutorial
Fast sorting and filtering
Use the panel on the left side to start browsing your current folders. You can select a different folder anytime. By default, ImageRanger shows you all found images in the selected folder and its subfolders. You can include/exclude certain subfolders.

When browsing folders, ImageRanger will try to index information about your images, determine the capture location and date, detect faces, read keywords and rating, among other features. Depending on number of files, the indexing might take some time, but this will happen only once per file. The indexing process happens in the background, and you can see below an example of how the indexing progress looks on the screen.

Indexing is done only once for each folder you visit.
The next time a folder is opened, the previous index is reused. You can also work on your other images while indexing is in progress. Indexing is needed for quick sorting, filtering and finding duplicates.
Basic Filtering
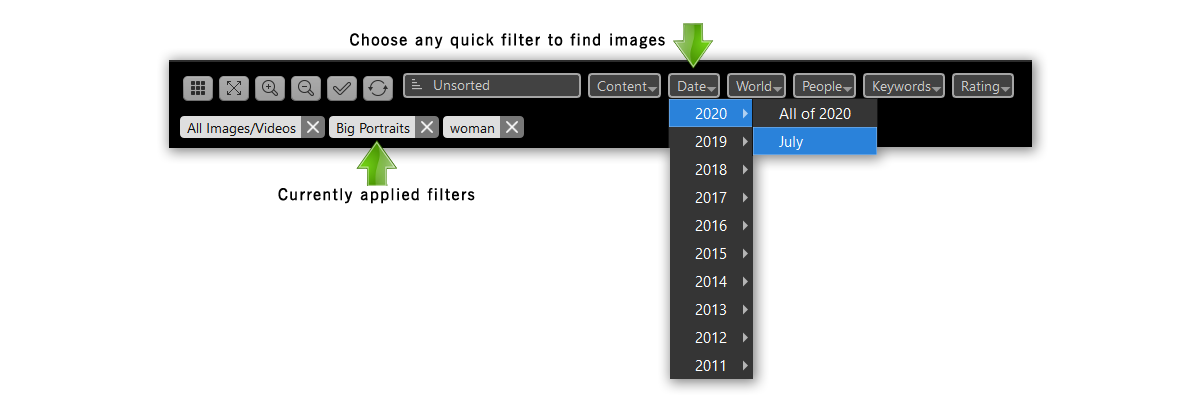
The easiest way to filter your images is to use the Quick Filters option on top of the main application window. Simply select location under the World button, or any capture date with the Date selector. Once the filters are applied, you will see a small tag under the filtering area. These tags indicate the currently selected filtering mode. Each filter can be cancelled at anytime.

Image Adjustments
To view a bigger version of the selected image, click on the Fit To Window or Zoom In buttons. Use the sliders on the right side to adjust image brightness, contrast, etc. To Undo your last action, use the main menu Edit, Undo Last Change or press Ctrl+Z or choose the Undo item using the Right Mouse Click contextual menu

How to setup face recognition
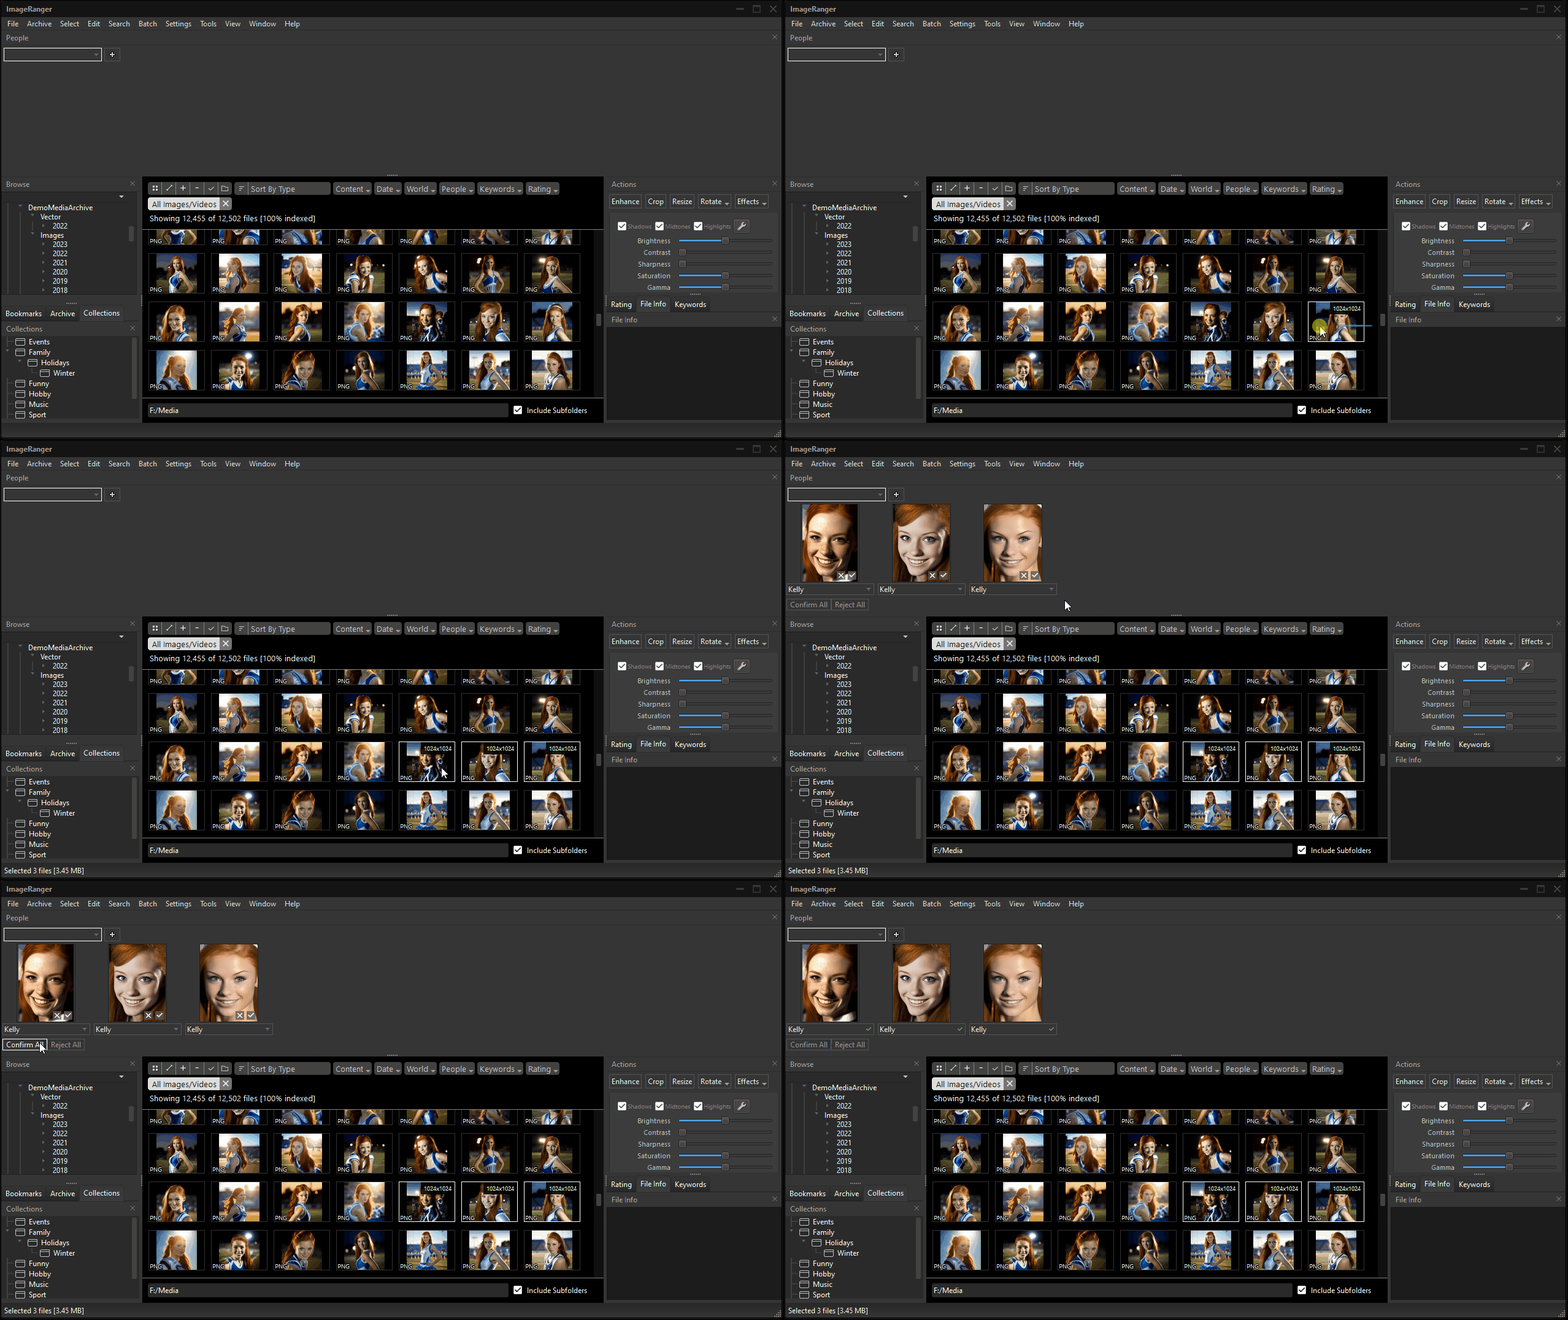
With face recognition, you can select and easily search photos with your friends and family. Start by selecting one or multiple photos containing faces. Press the plus button to add a new person to the list of your known people. Once new person is added, you can simply select the corresponding person name for each face shown in the People panel.


How to arrange image files in folders
Setup a new archive folder by using Set Archive Location button. This is the place where you can import photos from various places. When the Archive location is configured, you can import selected images by using Import into Archive command from the contextual menu. The imported images are copied into the archive location and placed in the folder based on your setup, by Year, Month or Capture Location.

The archive location is always available to explore using any other file management software. It is possible to setup or change your Archive location at anytime.
