There are several ways to copy, move, delete files with ImageRanger.
Selecting files
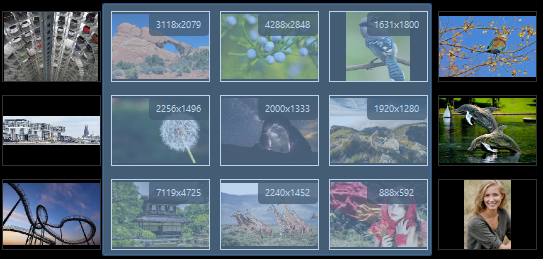
Files can be selected by left clicking the mouse in the Thumbnail View area. The currently selected files will be highlighted using a transparent overlay.
By default the dimensions of selected images are displayed directly on the image thumbnail icon. This setting can be changed in the Options dialog to render image dimensions on all or selected images.
The status bar will show information regarding currently selected files, for example:
For selecting entire collections, use the shortcut buttons from the main toolbar.
Alternatively, select all files via Select -> Select All menu items from the Main Menu.
How to copy files.
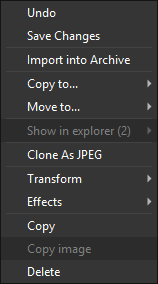
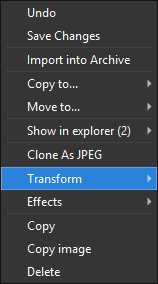
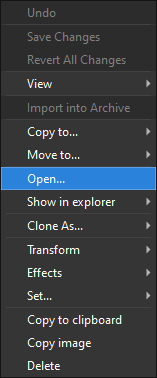
To copy files onto the operating system clipboard, select files in the Thumbnail View with the mouse and then right click to get the contextual menu shown in the screenshot below.
Using the Copy menu item the selected files can be copied onto the operating system clipboard.
All copied files can be pasted directly into Windows Explorer or using many alternative general file manager tools.
Copying and Moving files using the predefined destination folders
Copying and pasting files can be quite a slow process, hence ImageRanger provides additional ways to maneuver files.
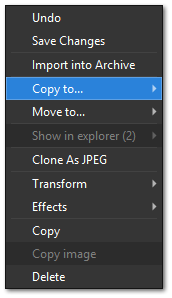
The Copy to...(Move to...) command from the contextual menu can be used to quickly copy (move) selected files.
Predefined destination folders are shown in the contextual menu.
The predefined destination folders are added automatically each time you use the Browse... button. The number of predefined destination folders is configurable using the program Options dialog.
The same Copy to...(Move to...) functionality is also available in the Edit submenu in the top Main Menu.
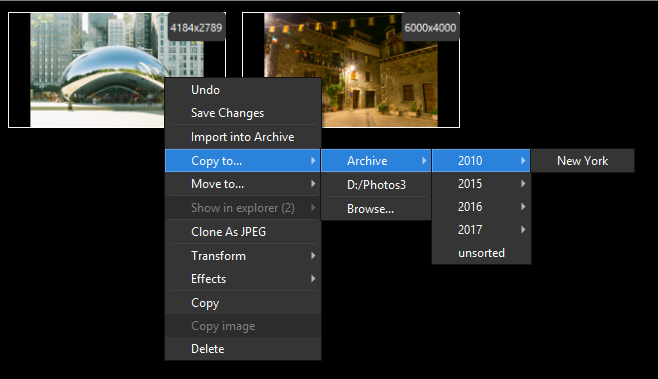
How to copy to Archive locations
When the Archive location is configured, ImageRanger will create a shortcut menu with all folders residing in the archive location.
This allows to copy images much faster:
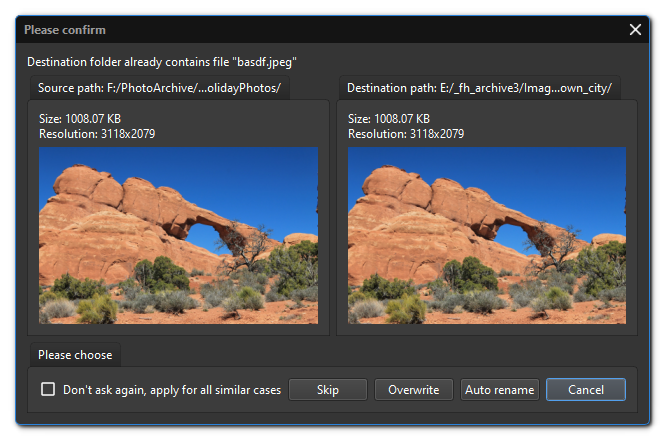
Solving file name conflicts
When copying or moving files, the same file could be already present in a destination folder.
In such cases, ImageRanger will show the following confirmation dialog:
There are options to skip this file, replace the old image, or automatically rename the file.
When files are renamed, the new name with the suffix "(1)" is used. The suffix will automatically increase where there are multiple copies of the same name found.
To apply the same action to all duplicate files, check the "Don't ask again,..." checkbox.
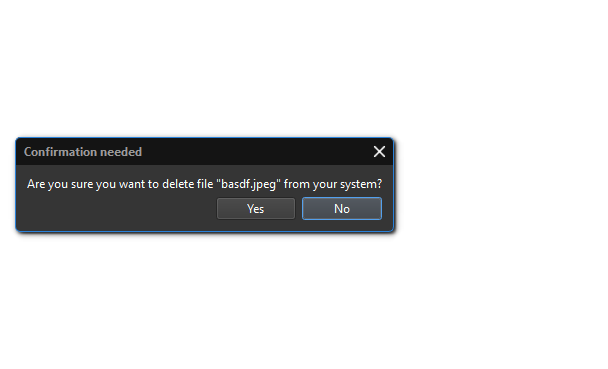
Deleting files
To delete selected files use the Right Mouse Button and select Delete item in the contextual menu.
The confirmation dialog can be turned off using the program Options dialog.
Copying an image
Some operating systems and image editors allows users to Copy/Paste image pixels directly onto the clipboard.
ImageRanger also supports copying image bitmap information into the system clipboard: select Copy Image in the contextual menu.
This function is only available when a single image is selected.
The copied pixels can then be pasted into generic image editing software (Microsoft Paint, etc.) or even directly into a browser (Google Chrome, etc.).
Showing file system
When a single file is selected, use the Show in Explorer menu item from the contextual menu to automatically open the file location using the system associated default file manager. In the typical Windows installation, the File Explorer would be opened showing your
current selected file in the original system file manager interface.
Clone as JPEG
When Clone as JPEG is selected in the contextual menu, the copy of the current image will be converted into JPEG format and saved in the same folder where the original image resides.
This is useful for working with RAW photo files since some raw formats do not support certain functions unless the file is converted into JPEG format.
If the original image is in JPEG format the new copy would be created. The clone operation is not available when the file search is in progress. Once the search is finished, this operation becomes available.
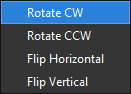
Transforming images
If one or more images are selected, it is possible to apply image transformations: Rotate Clockwise, Rotate Counterclockwise, Flip Horizontal, Flip Vertical.
Note, rotation operations will attempt to swap specific EXIF and XMP metadata values such as
"EXIF:PixelXDimension", "EXIF:PixelYDimension"
"EXIF:ImageWidth", "EXIF:ImageLength"
"XMP:ImageWidth", "XMP:ImageLength"
Rotation and Flip operations will clear EXIF:Orientation metadata.
Opening files in external software
Simply double click your mouse or use the context menu, select an image and choose Open... to start a default software application which handles image files on your computer.
Altenatively, hold Alt key and press O keys on your keyboard.
Default software to open files with specific extension can be changed in your operating system settings.
For example, on Windows 10, choose Settings > Apps > Default apps.